Mastering the Design Thinking Process: Your Step-by-Step Guide for UI/UX in 2026
Welcome to Layout Scene, where we equip designers like you with the knowledge to craft truly impactful experiences. In the ever-evolving landscape of UI/UX and web design, staying ahead means not just mastering tools, but mastering mindsets. Today, we’re diving deep into the Design Thinking process – a human-centered, iterative approach that empowers teams to innovate, solve complex problems, and deliver products and services that users genuinely love. Forget rigid methodologies; Design Thinking is a fluid framework that, when applied correctly, becomes your secret weapon for navigating the challenges and opportunities of 2026 and beyond. As a senior designer, I’ve seen firsthand how this process transforms ambiguity into clarity and ideas into tangible, user-validated solutions. Let’s unpack each stage, arming you with practical techniques and tools to elevate your design practice.
1. Empathize: The Foundation of True Innovation
The first, and arguably most crucial, step in Design Thinking is Empathize. This isn’t just about understanding your users; it’s about deeply immersing yourself in their world, feeling their frustrations, and uncovering their unspoken needs. Without genuine empathy, your designs risk being clever solutions to the wrong problems. In 2026, with diverse user bases and complex digital ecosystems, this stage is more vital than ever.
Techniques for Deep Empathy:
- User Interviews: Go beyond surface-level questions. Ask “why?” repeatedly to uncover root causes and motivations. Conduct these in your users’ natural environment if possible – observing them interact with existing solutions can be incredibly insightful.
- Observation & Contextual Inquiry: Watch users perform tasks without intervention. How do they navigate a website? What are their habits? What workarounds do they employ? Sometimes, what people do is more telling than what they say.
- Empathy Maps: A visual tool to synthesize your interview and observation data. Map out what users Say, Think, Do, and Feel. This helps identify contradictions and pain points.
- User Personas: Craft detailed, fictional representations of your key user segments based on your research. Include demographics, behaviors, motivations, goals, and pain points. Tools like Miro or FigJam offer excellent templates for collaborative persona creation.
- Journey Mapping: Visualize the entire user experience with a product or service, from initial awareness to post-use. Identify touchpoints, emotions, and pain points at each stage. This helps you see the bigger picture and pinpoint critical moments for intervention.
Tools to Aid Empathy:
- Miro / FigJam: For collaborative empathy mapping, user journey mapping, and persona creation. Their infinite canvases are perfect for synthesizing qualitative data visually.
- Dovetail / EnjoyHQ: Powerful research repositories for organizing, transcribing, tagging, and analyzing qualitative data from interviews and observations. They help you find patterns and themes efficiently.
- SurveyMonkey / Typeform: For gathering quantitative data and initial qualitative insights from a broader audience, though direct interviews offer deeper empathy.
- Hotjar / FullStory: For observing user behavior on existing websites/apps through heatmaps, session recordings, and conversion funnels, providing a digital layer of observation.
Practical Tips from a Senior Designer:
Don’t just collect data; internalize it. Spend time discussing your findings with your team. Put yourself in your users’ shoes. What would genuinely make their lives easier, more efficient, or more enjoyable? Remember, empathy isn’t a checklist; it’s a continuous mindset. It’s about building solutions with your users, not just for them.
2. Define: Sharpening the Problem Statement
Once you’ve immersed yourself in the user’s world, the next step is to Define the core problem you’re trying to solve. This stage is about synthesizing all your empathy research into a clear, actionable problem statement. It’s crucial to frame the problem from the user’s perspective, focusing on their needs, not on a specific solution. A well-defined problem acts as a compass, guiding your team through the subsequent stages of ideation and prototyping.
Techniques for Defining the Problem:
- Affinity Mapping: Gather all your research notes, observations, and insights from the Empathize stage. Write each distinct point on a separate sticky note (physical or digital). Then, as a team, group similar notes together based on natural relationships. Label each cluster with a theme or insight. This helps you identify recurring patterns and key problem areas.
- Point-of-View (POV) Statements: Frame the problem from the user’s perspective. A good POV statement follows this structure: “[User Name/Persona] needs a way to [User Need] because [Insight/Motivation].” For example: “A busy working parent needs a way to quickly find healthy dinner recipes because they lack time for meal planning and often resort to unhealthy takeout.”
- “How Might We” (HMW) Questions: Transform your POV statements into actionable questions that invite broad solutions. Take your POV statement and rephrase the “user need” as a “How Might We…” question. E.g., from the previous example: “How might we help busy working parents quickly find healthy dinner recipes?” or “How might we make meal planning less time-consuming for busy parents?” HMWs should be broad enough for creativity but narrow enough to be solvable.
- Problem Statement Canvas: A structured template that guides you through articulating the user, their needs, the current situation, desired outcome, and potential barriers.
Tools to Aid Definition:
- Miro / FigJam: Invaluable for affinity mapping and creating HMW questions collaboratively. Their digital sticky notes and infinite canvases facilitate rapid synthesis.
- Notion / Confluence: For documenting your personas, POV statements, and HMW questions, ensuring they are accessible to the entire team and serve as a single source of truth.
- Whimsical / Lucidchart: For creating visual diagrams like problem trees or cause-and-effect analyses to better understand the root causes of problems.
Practical Tips from a Senior Designer:
Resist the urge to jump to solutions. The Define stage is about clarity, not invention. Ensure your problem statement is user-centered, specific, and actionable. If your team struggles to generate diverse HMWs, your problem statement might be too narrow or already imply a solution. Keep iterating on your problem statement until it feels just right – clear, compelling, and open to innovation.
3. Ideate: Unleashing Creative Solutions
With a clear problem statement in hand, it’s time to unleash your creativity in the Ideate stage. This is where you generate a wide range of potential solutions, encouraging divergent thinking before converging on the most promising ideas. The goal here is quantity over quality initially – no idea is too wild or too silly. Embrace the “yes, and…” mentality.
Techniques for Productive Ideation:
- Brainstorming (Classic & Structured):
- Classic Brainstorming: Gather your team, state the HMW question, and generate as many ideas as possible without judgment. Encourage wild ideas, build on others’ ideas, and aim for sheer volume.
- Crazy 8s: A rapid sketching exercise where each person folds a piece of paper into eight sections and sketches eight distinct ideas for a solution in eight minutes (one minute per sketch). This forces quick thinking and diverse approaches.
- SCAMPER Method: A structured brainstorming technique using prompts: Substitute, Combine, Adapt, Modify (Magnify/Minify), Put to another use, Eliminate, Reverse (Rearrange). Apply these to an existing product or idea to generate new ones.
- Mind Mapping: Start with your core problem or HMW question in the center, then branch out with related concepts, features, or solutions. This helps visualize connections and explore different avenues.
- Worst Possible Idea: Sometimes, intentionally thinking of the absolute worst solutions can spark truly innovative ones by highlighting what not to do or by reversing a bad idea into a good one.
- Bodystorming: Physically act out scenarios or user interactions to understand the spatial and physical challenges and generate ideas for how a solution might work in a real-world context.
Tools to Aid Ideation:
- Miro / FigJam: Again, these collaborative whiteboarding tools are perfect for digital brainstorming, mind mapping, and organizing sticky notes from Crazy 8s. Their voting features can also help prioritize ideas.
- Physical Whiteboards & Sticky Notes: Sometimes, the tactile experience of writing on physical notes and moving them around fosters creativity in a way digital tools can’t fully replicate. Don’t underestimate the power of a good old-fashioned whiteboard session.
- Sketchbooks / Procreate: For individual or collaborative sketching sessions, allowing designers to quickly visualize concepts before moving to higher fidelity.
Practical Tips from a Senior Designer:
Foster an environment where everyone feels safe to share any idea. Defer judgment entirely during the initial ideation phase. Encourage diverse perspectives – invite non-designers, developers, and even sales or marketing team members to ideation sessions. Quantity truly is key here; you can always refine later. Remember, the goal is not to find the solution, but to generate a pool of potential solutions.
4. Prototype: Bringing Ideas to Life (Visually!)
The Prototype stage is where your abstract ideas begin to take tangible form. This isn’t about creating a perfect, polished product; it’s about building quick, inexpensive, and scaled-down versions of your solutions to test key assumptions and gather feedback. Prototypes help you learn fast and fail cheap, allowing for rapid iteration before investing heavily in development.
Techniques for Effective Prototyping:
- Low-Fidelity Prototyping:
- Sketching: The fastest way to get an idea out of your head and onto paper. Use pen and paper to draw user flows, screen layouts, or components. Focus on functionality, not aesthetics.
- Paper Prototyping: More detailed than simple sketches, these involve drawing out screens and UI elements on separate pieces of paper. You can simulate interaction by swapping out screens as the user “navigates.” This is excellent for early user testing.
- Wireframing: Digital representations of screen layouts, focusing on content, structure, and hierarchy. Tools like Balsamiq or even Figma/Adobe XD in wireframe mode are perfect for this. They strip away visual design to focus on core functionality.
- Mid-Fidelity Prototyping:
- Interactive Wireframes: Adding basic interactivity (clicks, scrolls) to your wireframes to simulate a user flow. Figma and Adobe XD excel at this, allowing you to link screens and create simple animations.
- High-Fidelity Prototyping:
- Mockups: Static, pixel-perfect visual designs that incorporate branding, colors, typography, and imagery. These are what most people think of as “designs.”
- Interactive Prototypes: Fully interactive simulations that mimic the final product’s look, feel, and functionality. These are built in tools like Figma, Adobe XD, or Sketch + InVision, allowing users to navigate through the experience as if it were a live app.
Tools for Prototyping:
- Figma / Adobe XD / Sketch: The industry standards for UI design and interactive prototyping. They allow you to move seamlessly from wireframes to high-fidelity mockups and build complex interactive flows. Figma’s collaborative nature is particularly powerful for team prototyping.
- Balsamiq: Excellent for quick, low-fidelity wireframing with a hand-drawn aesthetic.
- InVision: Integrates well with Sketch and Photoshop for creating interactive prototypes from static screens.
- Pen & Paper: Never underestimate the power of simple tools for rapid ideation and initial prototyping.
Practical Tips from a Senior Designer:
Start low-fidelity and only increase fidelity as you gain confidence in your solution. Don’t fall in love with your first prototype – be prepared to discard it if testing reveals fundamental flaws. Focus on prototyping the riskiest assumptions first. What’s the core interaction or feature that needs validation? Build just enough to test that. Remember the core design principles: usability (is it easy to use?), accessibility (is it inclusive?), and visual hierarchy (is the information clear?).
5. Test: Validating and Refining
The Test stage is where your prototypes meet real users, and you gather critical feedback to refine your solutions. This isn’t about proving your idea is perfect; it’s about identifying flaws, uncovering new insights, and iterating based on genuine user reactions. Design Thinking is fundamentally iterative, and testing provides the data to fuel that iteration.
Techniques for Effective Testing:
- Usability Testing (Moderated & Unmoderated):
- Moderated: A facilitator guides users through tasks, observes their behavior, and asks follow-up questions in real-time. This provides rich qualitative data and allows for probing deeper into user motivations.
- Unmoderated: Users complete tasks on their own, often remotely, with their screens and voices recorded. This allows for testing with a larger number of participants and gathering data more quickly, though with less depth than moderated sessions.
- A/B Testing: Presenting two different versions of a design (A and B) to different user segments and measuring which performs better against specific metrics (e.g., conversion rates, click-through rates). This is excellent for optimizing specific elements.
- Guerrilla Testing: Quick, informal testing sessions conducted in public places (e.g., coffee shops, co-working spaces) with willing participants. It’s great for getting rapid feedback on low-fidelity prototypes.
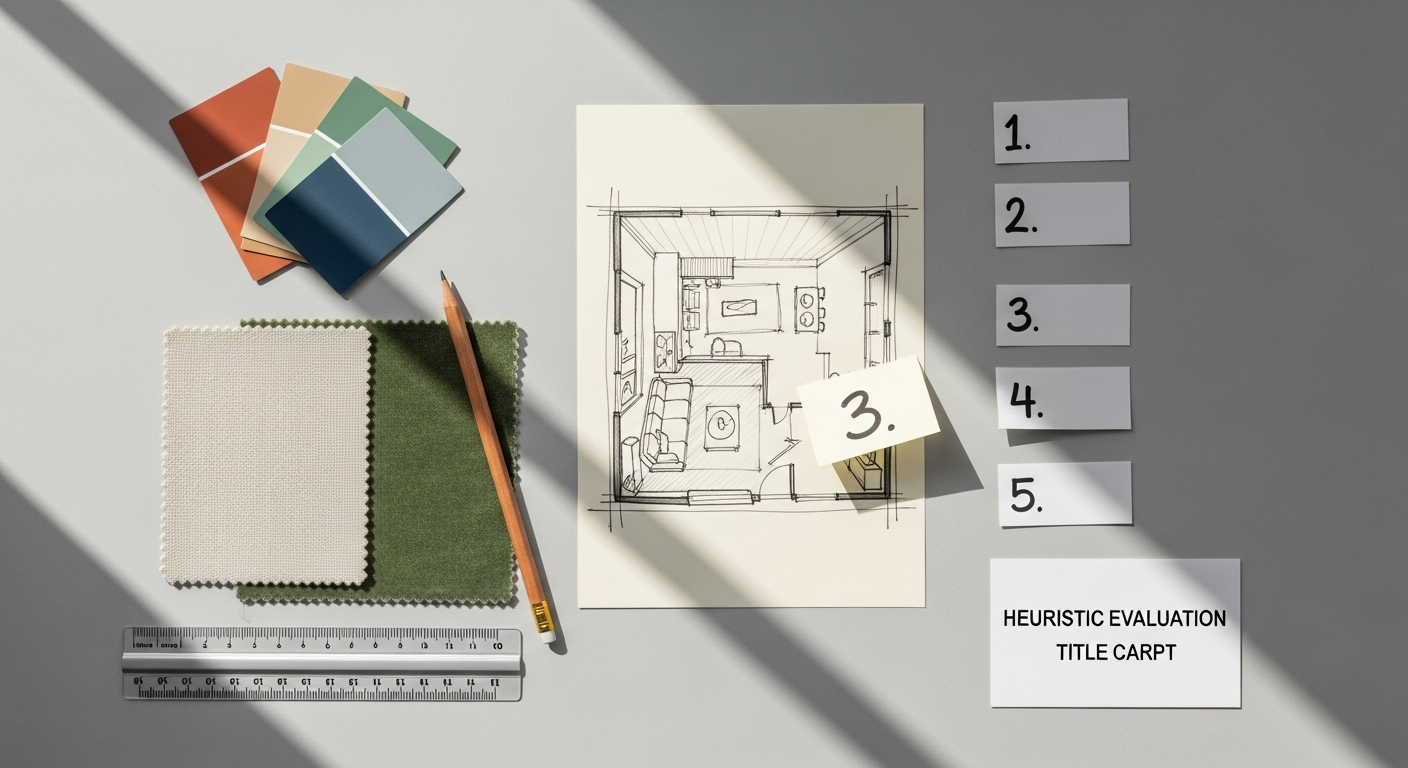
- Heuristic Evaluation: Experts (often other designers) review your prototype against a set of established usability principles (heuristics) to identify potential issues. While not direct user testing, it’s a valuable internal validation step.
Tools to Aid Testing:
- UserTesting / Lookback: Platforms for conducting both moderated and unmoderated usability tests, recruiting participants, recording sessions, and analyzing results.
- Maze / Usability Hub: For quick, unmoderated tests like first-click tests, five-second tests, and preference tests, helping validate specific design decisions.
- Hotjar / Google Analytics: While not direct testing tools for prototypes, they provide invaluable data on how users interact with live products, informing future iterations and testing cycles.
- Figma / Adobe XD (Sharing Features): Easily share your interactive prototypes with users for testing, often with built-in commenting features for direct feedback.
Practical Tips from a Senior Designer:
Recruit participants who genuinely represent your target users. Avoid leading questions; instead, observe and listen. Focus on understanding why users behave a certain way, not just what they do. Document everything – take notes, record sessions, and synthesize findings as a team. Be prepared for uncomfortable truths; user feedback is a gift, even when it challenges your assumptions. The insights gained here will inform the next iteration of your prototype, bringing you closer to a truly user-centered solution.
The Iterative Dance: Beyond Linear Thinking
It’s crucial to understand that Design Thinking is not a linear, step-by-step process you complete once. It’s an iterative loop. Insights gained during Testing might send you back to Empathize to better understand a newly uncovered need, or back to Ideate to brainstorm different solutions, or back to Prototype to try a new approach. This continuous cycle of understanding, ideating, building, and learning is what makes Design Thinking so powerful and adaptable for the dynamic challenges of 2026. Embrace the ambiguity, celebrate learning from “failures,” and always keep the user at the heart of your design journey.
Frequently Asked Questions About Design Thinking
Q1: Is Design Thinking only for UI/UX designers?
A1: Absolutely not! While deeply rooted in human-centered design, Design Thinking is a versatile framework applicable across various fields – from product development and business strategy to education and social innovation. It’s a problem-solving methodology that benefits any team looking to create user-centric solutions, regardless of their specific domain.
Q2: How long does a typical Design Thinking process take?
A2: The duration is highly variable, depending on the complexity of the problem, the resources available, and the desired depth of research and prototyping. A focused sprint might take a few days or weeks, while addressing a complex, systemic challenge could span several months with multiple cycles. The key is to embrace iteration and move through the stages as quickly and efficiently as needed to gain valuable insights.
Q3: What’s the biggest challenge when implementing Design Thinking?
A3: One of the biggest challenges is often organizational culture – specifically, moving away from a traditional, linear, or solution-first mindset. It requires a willingness to embrace ambiguity, accept that failure is a learning opportunity, and genuinely empower teams to experiment. Getting stakeholder buy-in for user research and iterative development can also be an initial hurdle.
Q4: Can Design Thinking be applied to existing products or only new ones?
A4: Design Thinking is incredibly effective for both! For existing products, it can be used to identify areas for improvement, solve persistent user pain points, or innovate new features. By empathizing with current users, defining existing problems, and ideating new solutions, you can continually evolve and enhance your product’s value and user experience.
Q5: How do I convince my team or stakeholders to adopt Design Thinking?
A5: Start small and demonstrate its value through a pilot project. Focus on showing tangible results: how it helped uncover critical user needs, how it led to more innovative solutions, or how it saved resources by validating ideas early. Frame it in terms of business benefits like reduced risk, increased user satisfaction, and faster time to market for truly valuable features. Sharing success stories and providing practical examples can be very persuasive.
Conclusion: Your Design Compass for 2026 and Beyond
The Design Thinking process is more than just a methodology; it’s a mindset that prioritizes empathy, creativity, and continuous learning. As UI/UX designers, web designers, and creative professionals, embracing this human-centered approach is not just a best practice – it’s an imperative for delivering truly meaningful and impactful experiences in 2026’s rapidly evolving digital landscape. By diligently moving through Empathize, Define, Ideate, Prototype, and Test, you’ll transform complex problems into elegant solutions, fostering innovation and building products that genuinely resonate with your users. So, roll up your sleeves, gather your team, and embark on this iterative journey. The future of design is collaborative, empathetic, and always centered on the human experience.