Mastering Prototyping: A Comprehensive Guide to Bringing UI/UX Designs to Life
By Alex Johnson | Published by LayoutScene
Prototyping is far more than just creating a clickable mockup; it’s a critical methodology that empowers teams to explore, test, and refine designs before committing significant resources to development. It acts as a bridge between ideation and implementation, allowing for rapid iteration and informed decision-making. By embracing prototyping, you gain the ability to simulate the user experience, identify usability issues early, and foster a collaborative environment where feedback is not just welcomed but actively sought. Join us as we explore every facet of this essential practice, from its fundamental principles to advanced techniques and the tools that make it all possible for effective UI/UX design prototyping.
What is the Indispensable Role of Prototyping in UI/UX Design?
At its core, prototyping serves as a tangible manifestation of a design idea, allowing stakeholders and, most importantly, users, to interact with a product concept as if it were real. This interactive experience offers unparalleled insights compared to static wireframes or mockups. Without effective prototyping in UI/UX design, teams risk building products that miss the mark, require costly reworks, or fail to meet user expectations. Its benefits are multi-faceted and touch every stage of the product lifecycle, crucial for successful digital product prototyping.
How Does Prototyping Validate Concepts and Assumptions?
One of the primary advantages of prototyping is its ability to validate design concepts and underlying assumptions. Before a single line of code is written, a prototype can demonstrate how a particular feature or user flow will function. For instance, imagine a new e-commerce checkout process. A prototype allows you to test whether users can intuitively navigate through the steps, identify clear calls to action, and complete their purchase without frustration. This early validation prevents the expensive rework that would be necessary if issues were discovered only after development began.
- Reduced Rework Costs: A study by IBM [link to study] found that fixing an error after development is 100 times more expensive than fixing it during the design phase. Prototypes significantly reduce these post-development fixes.
- Faster Iteration Cycles: Prototypes are designed for quick creation and modification. This agility enables design teams to test multiple solutions to a problem, gather feedback, and iterate rapidly, leading to more refined and robust designs in less time.
- Mitigating Risks: By identifying potential usability problems, technical constraints, or unmet user needs early on, prototyping acts as a powerful risk mitigation tool. It uncovers flaws when they are cheapest and easiest to address, ensuring better user experience validation.
How Does Prototyping Facilitate Communication and Collaboration?
Designs, especially complex ones, can be challenging to explain purely through static images or written descriptions. A prototype, however, speaks volumes. It provides a common ground for designers, developers, product managers, and business stakeholders to understand, discuss, and evaluate the proposed solution. This shared understanding is crucial for fostering effective collaboration and ensuring everyone is aligned on the product vision.
- Clearer Stakeholder Alignment: Presenting an interactive prototype to stakeholders allows them to “experience” the product, providing concrete feedback rather than abstract opinions. This leads to stronger buy-in and a clearer direction.
- Bridging the Gap Between Design and Development: Developers can interact with a prototype to understand the intended functionality, animations, and user flows, which translates into more accurate estimations and a smoother development process. For example, a high-fidelity prototype can demonstrate specific micro-interactions that developers can then implement precisely.
- User-Centric Feedback: Prototypes are invaluable for user testing. By putting an interactive version of the product into the hands of real users, designers can observe their behavior, listen to their feedback, and uncover pain points that would otherwise remain hidden. This direct user insight is the cornerstone of truly user-centered design.
Actionable Tip: Before starting any prototyping, clearly define what questions you aim to answer with your prototype. This focused approach ensures your efforts are goal-oriented and yield actionable insights, maximizing the value of your prototyping exercises for effective UI/UX design prototyping.
Understanding Prototyping Fidelity: Low-Fi vs. High-Fi
The term “fidelity” in prototyping refers to the level of detail and functionality a prototype possesses, mimicking the final product. Choosing the right fidelity is a strategic decision, influenced by your project stage, testing goals, and available resources. There are generally two main categories: low-fidelity (low-fi) and high-fidelity (high-fi) prototypes, each with distinct advantages and use cases in digital product prototyping.
What is Low-Fidelity Prototyping: Speed and Concept Validation?
Low-fidelity prototypes are characterized by their simplicity and lack of detail. They are quick to create and focus on core functionality, information architecture, and user flow rather than aesthetics. They are rough, conceptual, and inexpensive to produce, making them ideal for early-stage design exploration and concept validation.
- Characteristics:
- Minimal visual design (e.g., hand-drawn sketches, basic shapes).
- Limited interactivity, often just basic clicks.
- Focus on functionality and layout, not pixel perfection.
- Easy to modify and discard.
- When to Use:
- Early Ideation: Brainstorming different design solutions or user flows.
- Concept Testing: Validating fundamental ideas with users before investing heavily in visual design.
- Internal Discussions: Quickly communicating ideas within the design team or with immediate stakeholders.
- Information Architecture Testing: Assessing whether the navigation and content organization make sense.
- Examples:
- Paper Prototypes: Hand-drawn sketches on paper, often with elements cut out and moved around by hand to simulate interaction. These are incredibly fast and encourage creative exploration without attachment to a specific design.
- Clickable Wireframes: Digital wireframes (e.g., created in Figma, Sketch, or Adobe XD) linked together to simulate basic navigation. They provide a slightly more structured experience than paper prototypes but still maintain a low level of visual detail. For more, explore wireframing best practices.
Practical Tip: When conducting user tests with low-fidelity prototypes, emphasize to participants that the design is rough and they should focus on the functionality and ease of use, not the visual polish. This helps manage expectations and encourages more honest feedback about the core experience.
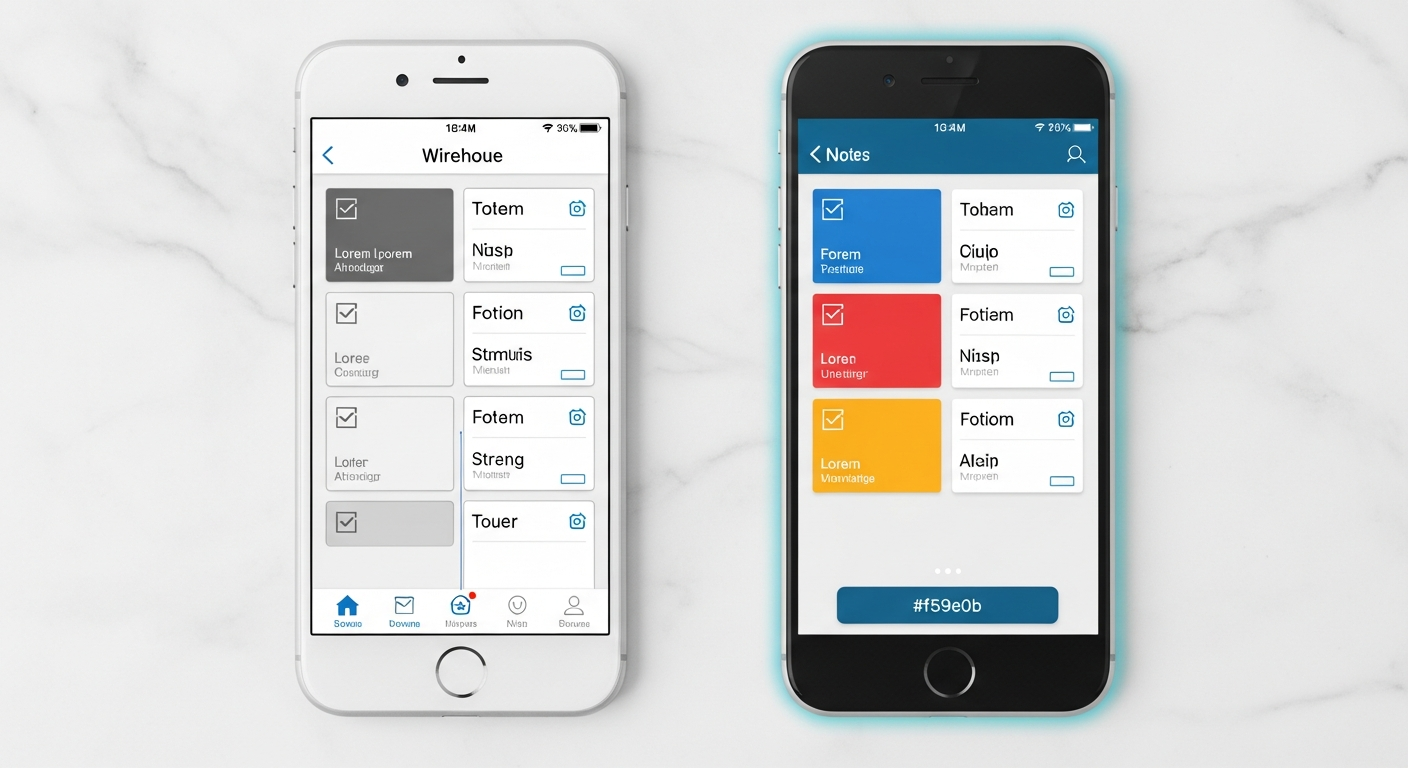
What is High-Fidelity Prototyping: Realism and Refinement?
High-fidelity prototypes closely mimic the final product’s look, feel, and functionality. They include detailed visual design, realistic interactions, animations, and sometimes even dynamic data. These prototypes require more time and effort to create but offer a much more immersive and realistic user experience, making them ideal for fine-tuning designs and conducting comprehensive usability tests.
- Characteristics:
- Detailed visual design (colors, typography, imagery, branding).
- Rich interactivity, including micro-animations and transitions.
- Realistic data representation (though often static data).
- Close resemblance to the final product.
- When to Use:
- Usability Testing: Identifying subtle usability issues, friction points, and opportunities for interaction refinement.
- User Acceptance Testing (UAT): Getting final validation from end-users before development.
- Stakeholder Presentations: Demonstrating the near-final product to secure approval or investment.
- Developer Handoff: Providing developers with a clear and interactive blueprint of the intended user experience, including specific interaction details and animations. For more on this, see advanced interaction design principles.
- Examples:
- Interactive Mockups: Pixel-perfect designs with fully functional navigation, forms, and interactive elements, often created in tools like Figma, Sketch, or Adobe XD, and then prototyped within the same tools.
- Advanced Prototypes: Prototypes created with specialized tools like ProtoPie or Axure RP that can simulate complex logic, conditional flows, and even integrate with external data sources for a truly realistic experience.
Practical Tip: Don’t jump straight to high-fidelity prototyping. Always start low-fi to validate core concepts, then gradually increase fidelity as designs become more concrete. This “progressive enhancement” approach saves time and resources by ensuring you’re building the right thing before you build it beautifully.
What are the Key Stages and Workflow for Effective Prototyping?
Effective prototyping is not a haphazard activity; it’s an integral part of a structured UI/UX design process. A clear workflow ensures that prototyping efforts are targeted, efficient, and yield valuable insights. While specific steps may vary slightly based on project scope and team dynamics, the general stages remain consistent for robust UI/UX design prototyping.
1. How to Plan and Define Prototyping Objectives?
Before you even open a prototyping tool, clarity is paramount. This initial stage sets the foundation for your prototyping efforts.
- Identify Design Challenges: What specific problems are you trying to solve? Is it a complex user flow, a new feature, or an entire product redesign?
- Define Test Goals: What questions do you want your prototype to answer? Are you testing the learnability of a new interface, the effectiveness of a call-to-action, or the overall satisfaction with a new interaction model? For example, a goal might be: “Can 80% of users successfully complete the product customization flow within 2 minutes?”
- Determine Fidelity Level: Based on your goals and project stage, decide whether a low-fidelity, mid-fidelity, or high-fidelity prototype is most appropriate. Early concept testing often benefits from low-fi, while later usability testing requires high-fi.
- Scope the Prototype: Define which parts of the product or specific features will be prototyped. Avoid trying to prototype the entire application unless absolutely necessary, especially early on. Focus on critical paths or areas of uncertainty.
Actionable Tip: Write down your test objectives as clear, measurable questions. This ensures that when you analyze your test results, you know exactly what success looks like and what insights you need to extract.
2. How to Design and Create a Prototype?
Once your objectives are clear, it’s time to build the prototype. This stage involves translating your static designs (wireframes, mockups) into an interactive format.
- Gather Existing Assets: Collect any relevant wireframes, mockups, design systems, or brand guidelines that will inform your prototype’s visual and interactive elements.
- Choose Your Tool: Select the most appropriate prototyping tool based on your fidelity requirements, team familiarity, and the complexity of interactions you need to simulate (see next section for more on tools).
- Build Core Flows: Start by creating the primary user paths or scenarios you defined in the planning stage. Focus on the required screens and interactive elements to support these flows.
- Add Interactions: Link screens, define transitions (e.g., slide, dissolve, push), and add interactive elements like buttons, forms, and navigations. For higher fidelity, incorporate micro-interactions, animations, and conditional logic.
- Iterate Internally: Before user testing, conduct internal reviews with your design team or immediate stakeholders. Catch obvious errors, refine interactions, and ensure the prototype meets the defined objectives.
Actionable Tip: Don’t try to build everything at once. Build in layers, starting with the most critical paths. Test these core paths, gather feedback, and then expand the prototype’s scope or fidelity as needed.
3. How to Test and Collect Feedback from Prototypes?
This is where the prototype truly shines – by putting it in front of real users to gather invaluable insights.
- Recruit Target Users: Find participants who represent your actual user base. This is crucial for obtaining relevant and actionable feedback. For example, if you’re designing for small business owners, recruit small business owners.
- Facilitate Testing Sessions: Conduct usability tests where users interact with the prototype while you observe and take notes. Ask open-ended questions to understand their thought process, pain points, and preferences. Consider applying usability heuristics for a structured evaluation.
- Collect Diverse Feedback: In addition to formal usability tests, consider other methods like A/B testing variations of a prototype, unmoderated remote testing, or even guerrilla testing in public spaces (for low-fi concepts).
- Document Findings: Systematically record observations, user comments, and identified issues. Categorize feedback by severity, frequency, and type (e.g., usability issue, missing feature, visual preference).
Actionable Tip: Focus on observing user behavior, not just listening to what they say. Often, users will struggle with something but then rationalize their actions. The struggle itself is the valuable data point, helping with user experience validation.
4. How to Iterate and Refine Prototypes?
The feedback gathered from testing is worthless if not acted upon. This stage involves translating insights into design improvements.
- Analyze Feedback: Consolidate and analyze user feedback. Look for patterns, recurring issues, and critical pain points that directly impact your test objectives. Prioritize issues based on severity and impact. Be mindful of cognitive biases during analysis.
- Synthesize Learnings: Translate observations into actionable design recommendations. What changes need to be made to the prototype to address the identified problems?
- Revise the Prototype: Implement the necessary design changes in your prototype. This might involve adjusting layouts, refining interactions, adding new elements, or simplifying flows.
- Retest (if necessary): For significant changes, or if critical issues remain, conduct another round of testing to validate the revisions. This iterative loop is fundamental to refining designs.
Practical Tip: Maintain a feedback log or issue tracker. This helps you keep track of all identified problems, proposed solutions, and their resolution status, ensuring no valuable feedback is lost.
What are the Essential Tools for Prototyping in UI/UX Design?
The landscape of UI/UX design tools is constantly evolving, with powerful software making it easier than ever to create interactive prototypes. Choosing the right tool depends on your project’s specific needs, your team’s familiarity, and the required fidelity level. Here, we highlight some of the leading contenders in the market for UI/UX design prototyping.
Figma: The Collaborative Powerhouse for Prototyping
Figma has rapidly become an industry standard, celebrated for its real-time collaboration features and robust design and prototyping capabilities, all within a browser-based environment.
- Strengths:
- Real-time Collaboration: Multiple designers can work on the same file simultaneously, making it ideal for distributed teams.
- All-in-One Solution: Seamlessly integrates design, prototyping, and developer handoff.
- Powerful Prototyping: Supports complex interactions, overlays, animated transitions, and smart animate for sophisticated motion.
- Component-Based Design: Excellent for creating and managing design systems, ensuring consistency.
- Community Resources: A vast library of plugins and community files.
- Use Cases: From low-fidelity wireframes to high-fidelity interactive prototypes and design systems. Ideal for collaborative projects and large teams.
Sketch: The Mac-Native Veteran for UI/UX Prototyping
A long-standing favorite, Sketch excels as a vector-based design tool primarily for macOS users. While not browser-based like Figma, it offers powerful design features and integrates well with various third-party prototyping plugins.
- Strengths:
- Robust Design Features: Excellent for UI design, vector editing, and icon creation.
- Plugin Ecosystem: A rich array of plugins (e.g., Anima, Abstract) extends its functionality, including advanced prototyping.
- Symbol Management: Strong system for reusable components, similar to Figma’s components.
- Use Cases: Best for Mac-centric design teams focused on UI design and integrating with specialized prototyping plugins for interaction.
Adobe XD: The Creative Cloud Integrator for Prototyping
Part of the Adobe Creative Cloud suite, Adobe XD offers a streamlined experience for designing, prototyping, and sharing user experiences, with strong integration with other Adobe products.
- Strengths:
- Creative Cloud Integration: Seamlessly works with Photoshop, Illustrator, and After Effects.
- Auto-Animate: Creates impressive micro-interactions and transitions with minimal effort.
- Voice Prototyping: Unique feature for designing voice user interfaces.
- Component States: Facilitates creation of interactive elements with different states (e.g., hover, clicked).
- Use Cases: Ideal for designers already embedded in the Adobe ecosystem, working on projects requiring visual fidelity and diverse interaction types.
ProtoPie & Axure RP: The Advanced Interaction Specialists for Digital Product Prototyping
For highly complex interactions, conditional logic, and prototypes that need to feel almost like a fully developed application, tools like ProtoPie and Axure RP step in, enabling sophisticated digital product prototyping.
- ProtoPie: Focuses on realistic, code-like interactions without actual coding. It’s excellent for demonstrating intricate micro-interactions, sensor-based triggers (e.g., tilt, sound), and bridging the gap between design and development with incredible precision.
- Axure RP: A powerful tool for enterprise-level prototyping, offering robust conditional logic, dynamic content, data-driven interactions, and the ability to build prototypes that simulate complex web applications. It has a steeper learning curve but offers unmatched control for advanced scenarios.
Actionable Tip: When selecting a tool, consider your team’s existing skill set, the complexity of interactions you need to prototype, the importance of collaboration, and your budget. Often, a combination of tools (e.g., Figma for overall design and ProtoPie for specific complex interactions) can be the most effective strategy.
How to Maximize Value: Best Practices for Prototyping and User Testing?
Creating a prototype is only half the battle; the real value comes from how it’s used to gather insights and refine designs. Adhering to best practices ensures your prototyping efforts are efficient, effective, and lead to truly user-centered products, enhancing user experience validation.
1. How to Start with Clear Objectives and Scenarios for Prototyping?
As mentioned, every prototype should have a purpose. Before you begin building, clearly define what you want to learn. Develop specific user scenarios or tasks that directly address your research questions. For example, instead of “test the app,” aim for “can users successfully add three items to their cart, apply a discount code, and complete checkout within 5 minutes?” This focus guides both prototype creation and testing.
2. How to Recruit the Right Users for Prototyping Tests?
The quality of your feedback is directly tied to the quality of your participants. Recruit users who genuinely represent your target audience. If you’re designing for doctors, test with doctors. If you’re designing for teenagers, test with teenagers. Avoid testing exclusively with internal team members, as they often carry inherent biases and familiarity with the product.
3. How to Test Iteratively and Early in the Prototyping Process?
Don’t wait until your prototype is “perfect” to test. The earlier you test, the cheaper it is to make changes. Embrace an iterative approach: prototype a small chunk, test it, learn from feedback, refine, and then repeat. This continuous feedback loop ensures designs are consistently informed by user insights. A common mistake is to spend too much time perfecting a prototype before testing, only to find fundamental flaws that require extensive rework.
4. How to Facilitate Unbiased Testing Sessions?
“Observe, don’t interfere. The user is always right in their experience, even if they’re ‘wrong’ in their actions according to your design.” – Steve Krug, “Don’t Make Me Think”
Encourage users to “think aloud” as they interact with the prototype. This provides rich qualitative data about their mental models and decision-making processes.
5. How to Prioritize and Act on Feedback from Prototyping?
You won’t be able to address every piece of feedback. After testing, categorize issues by severity and frequency. Focus on critical usability problems that impact a large number of users or prevent them from completing key tasks. Discuss findings with your team to determine the most impactful design changes. Remember, negative feedback is a gift – it points to areas for improvement.
- Severity Scale Example:
- Critical: Users cannot complete core tasks; leads to abandonment.
- Major: Significant frustration or delays; workaround required.
- Minor: Annoyance or inefficiency; easily overlooked.
- Suggestion: Enhancements or new feature ideas.
6. How to Manage Expectations with Prototyping Fidelity?
When presenting low-fidelity prototypes, clearly communicate that it’s a rough draft and not the final product. This manages stakeholder and user expectations, directing their feedback to functionality and flow rather than visual polish. Conversely, high-fidelity prototypes should be presented with the expectation that fine-tuning is still possible, but the core design is largely established.
7. How to Document and Share Learnings from Prototyping?
Maintain a repository of your prototypes, test plans, and findings. This institutional knowledge is invaluable for future projects, helping to avoid repeating mistakes and building on past successes. Share key insights with the broader team and stakeholders to keep everyone informed and reinforce the value of user research.
Practical Tip: Implement a “bug bash” session with internal stakeholders on a high-fidelity prototype. This can catch many minor UI/UX issues before formal user testing, allowing you to focus user testing on more fundamental usability questions.
What are the Future Trends and Evolution of Prototyping?
The field of prototyping is continuously evolving, driven by advancements in technology and a growing demand for more efficient and immersive design processes. Several emerging trends are set to reshape how designers bring their visions to life, particularly in digital product prototyping.
1. What is AI-Powered Prototyping and Automation?
Artificial intelligence is beginning to influence prototyping in several ways. We’re seeing tools that can automatically generate design variations based on user data, convert hand-drawn sketches into digital wireframes, or even suggest optimal layouts and components. AI could soon automate repetitive tasks in prototype creation, allowing designers to focus more on strategic thinking and complex problem-solving. Imagine an AI that can analyze user feedback and suggest iterative design improvements directly within the prototype, significantly accelerating the refinement process for UI/UX design prototyping.
2. What are No-Code/Low-Code Platforms for Interactive Experiences?
The rise of no-code and low-code platforms is democratizing the creation of interactive digital experiences. While not strictly prototyping tools, many of these platforms (e.g., Webflow, Bubble, Adalo) allow designers to build fully functional web and mobile applications with extensive interactivity and data integration, often bypassing traditional development cycles for validation. This blurs the line between high-fidelity prototyping and actual product development, enabling designers to ship validated concepts faster than ever before.
3. How is Prototyping Evolving for Emerging Technologies (VR/AR, Voice UI)?
As virtual reality (VR), augmented reality (AR), and voice user interfaces (VUI) become more prevalent, so too will specialized prototyping tools for these mediums. Designing for 3D spaces or purely auditory interfaces presents unique challenges that traditional screen-based tools cannot fully address. We are seeing tools like VR Sketch for VR environments or specific VUI design tools that allow designers to prototype spatial interactions, haptic feedback, and conversational flows, pushing the boundaries of interactive design.
- Example: For VUI, designers might use tools to map out conversational flows and test how users interact with voice commands before any backend logic is built. This can reveal awkward phrasing or missing pathways in the voice interaction tree.
4. What are the Enhancements in Design-to-Development Handoff?
The handoff process between design and development has historically been a point of friction. Future prototyping tools are increasingly focused on creating more seamless transitions. Features like automatically generated code snippets, detailed design specifications, interactive component libraries linked directly to code, and version control integrations are becoming standard. This allows developers to inspect prototypes, extract assets, and understand interactions with greater precision, reducing misinterpretations and speeding up implementation.
5. What is Data-Driven Prototyping?
Integrating real-time or simulated data directly into prototypes will become more common. This allows for truly dynamic prototypes that react to inputs, display personalized content, and simulate complex real-world scenarios more accurately. Imagine a banking app prototype that fetches simulated transaction data, providing a much more realistic user testing experience than a static mockup.
Practical Tip: Stay curious and continuously explore new tools and techniques. Experiment with emerging platforms to understand their potential and incorporate relevant innovations into your prototyping workflow to remain at the forefront of UI/UX design.
Conclusion: Mastering Prototyping for UI/UX Success
Mastering prototyping is not merely about acquiring proficiency with a set of tools; it’s about embracing a mindset of iterative design, continuous learning, and unwavering user-centricity. From the initial scribbles of a low-fidelity sketch to the sophisticated interactions of a high-fidelity marvel, prototyping in UI/UX design stands as the most potent bridge between an abstract idea and a delightful user experience. It’s the mechanism through which assumptions are tested, risks are mitigated, and feedback is transformed into tangible improvements, leading to robust user experience validation.
By integrating robust prototyping practices into your design workflow, you empower your team to communicate more effectively, collaborate more seamlessly, and build products that truly resonate with their intended audience. The journey of bringing UI/UX designs to life is an ongoing one, punctuated by moments of insight gleaned from user interactions and the tireless pursuit of perfection. As the digital landscape continues to evolve, the principles of effective prototyping—clarity of purpose, iterative testing, and a deep understanding of user needs—will remain timeless pillars of successful product development, especially in digital product prototyping.
Now that you’ve explored the comprehensive guide to mastering prototyping, it’s time to put these principles into action. Choose your next design challenge, select an appropriate tool, define your objectives, and start prototyping. The most valuable lessons are learned through doing. Dive in, experiment, gather feedback, and iterate your way to exceptional UI/UX designs. Your users—and your development team—will thank you for it.
Frequently Asked Questions About Prototyping in UI/UX Design